
In my previous post, I gave a quick run-down of using the N-CUS1 selector in +W to change customer records. 98% of the time, that’s what I’m doing when I’m in +W. Occasionally, though, I need to mass-change item records. Here’s how we use R-CAT1 to do just that.
As a bit of background, my dealership recently acquired another in a neighboring state. Here in my state, food, coffee, and tea are non-taxable, whereas they are taxable in this neighboring state. That was a bit of a problem because, as far as I was aware, DDMS could only handle a single GL Dept per item. My first non-taxable department is now R, and all food, drinks, etc, are in Dept T, with the exception of K-Cups, which we have in U. (Incidentally, the First Non-Tax Dept parameter in located in LG3, and it is location-specific, which is also a tale for another time).
Initially, DDMS support was less than helpful, suggesting our only option might be to turn the CCH Taxing software back on. That’s a whole other thing for another time, but suffice it to say, that option was off the table.
Then, in a conference call between my office, some DDMS people, and yet another of our offices in another state entirely, it was spilled that DDMS can, in fact, handle multiple GL Departments on items, per location. Perfect!
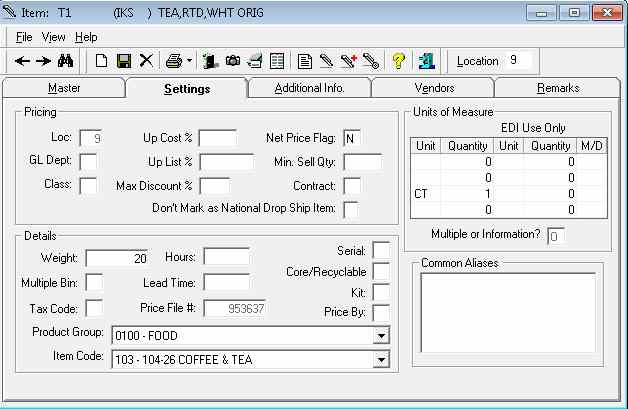
First, I needed a visual on what we were even talking about. In a quiet little corner of Item Settings, it had been hiding the whole time:
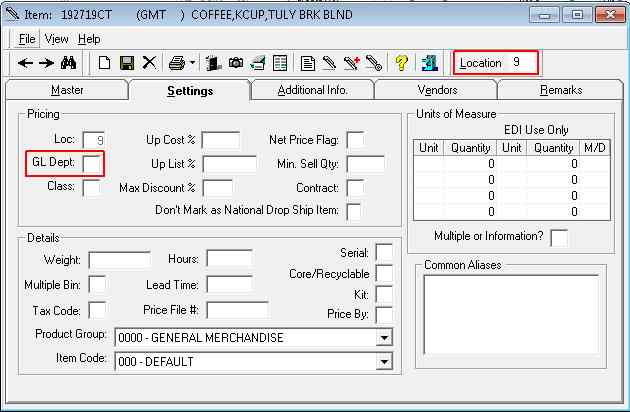
I have highlighted here the two most important fields: GL Dept and Location. Location will come into play once it’s time to actually make the change. Next up, though, we need to find where this filed might be hiding. For me, I prefer to find things on my own. DDMS support lately has been…interesting. I would take the time to open a ticket, I’d get a voicemail (since odds are good I wouldn’t be at my desk and off the phone) asking for a call back (without an extension, of course), then phone tag for two days, until finally I get an answer. Is it too much to ask to just reply on the ticket, “This is where it is. Have a good day.”? Apparently so. Instead, I’ll hunt it down myself. To do this, I change location to 19 in Item, then set my new department on some arbitrary item, say, GMT 192719CT, and my new department will be M. Then I crack open the IN directory on the DDMS share to find the file. Incidentally, DDMS techs have to ask/check often enough that I’ll throw this out there: If you’re not sure what directory you need, check L0. This will tell where all the files related to the various parts of DDMS are contained. I assume IN is pretty standard for Inventory, but your mileage may vary.
At any rate, once I’m in IN, I know enough to hit ‘i-‘ to jump to those files, that being the prefix for item files. Since the box containing Dept is titled ‘Pricing’, the i-price.dbf seems a likely candidate. Pop that open with Excel, Ctrl+F to search for the K-Cup SKU that I changed, and sure enough, there’s an M in the IP_DEPT column and the rest of the column is blank. Now we’re getting somewhere!
Back to DDMS text, then. As I mentioned up top, the selector we use for this is R-CAT1. Once again, we’ll get into +W, and use option B, Temporary Selector Change. Our selector, at the risk of redundancy, is R-CAT1. We’ll confirm we’re using the right selector, and first we’ll use L to Limit. This time, though, I’ll be doing something a little different. Where in Customer, I leave Location blank, since we don’t use location-specific Customer settings, this time I’m executing a change only on a specific location. In this case, Location 19.
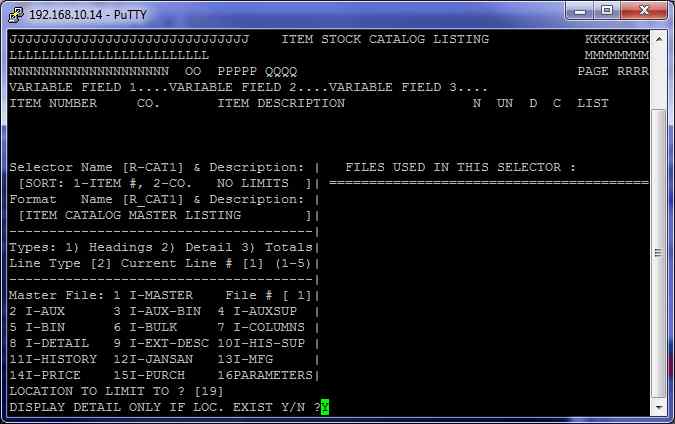
I don’t want to display detail only if this Loc exists, as I don’t currently have any item records for this location. Thus far, it’s been falling back to the default Loc 1 settings, which has been fine up until I discovered how to do what we’re doing here. All that to say, hit N at this prompt. We’ll first limit on I-Master, since the default GL Dept is held there. As we saw in mass-changing Customer, We first set our From limit by Tabbing down to Dept:
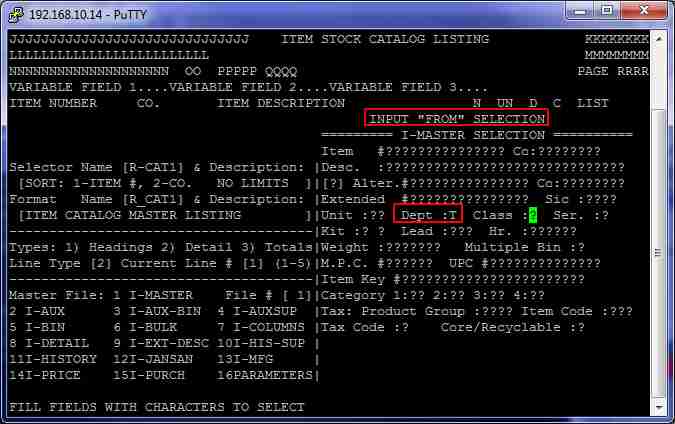
As I recall, for a change like this, DDMS says if your From and To limits are the same, you can just enter through the To limit. I’ve found DDMS’ documentation to be wrong often enough that I don’t trust it, and I haven’t worked up the motivation to test it thus far, so we Enter to get to our To limit, and we Tab again to Dept and set it as T again, then Enter to return to the file # prompt:

This is the only limit we need, so we’ll escape back to the Limit/Modify/Delete prompt. Now we’ll hit M to Modify. I-Price is the file we need to change, so we’ll specify our file with 14. As with mass-changing Customer, our first time through, we tell DDMS what field we’re changing by filling that field with 1s (or, in this case, a single 1):
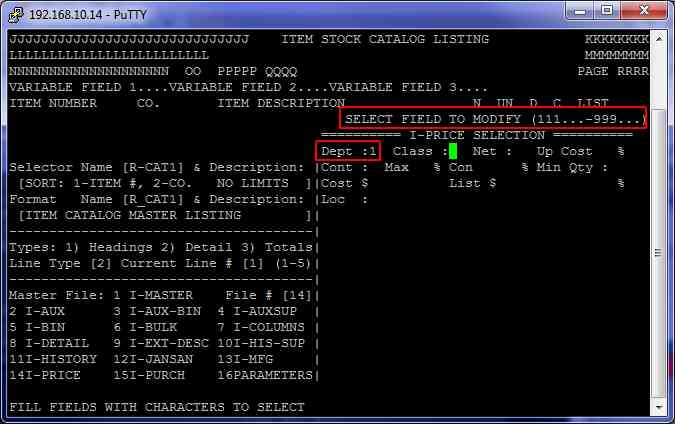
Then we Enter to set how we’re modifying the field. In this case, I’m making my new Dept M:

We Enter to return to the File # box. Then we Esc back to the Limit, Modify, or Delete prompt, and we’re ready to Execute. Enter your change password, and N at the Verify Changes record by record? prompt. Now hold your breath and hit Y at the Are You Sure? prompt.
Once it’s done, it shows us how many records it changed, 1918 in my case:
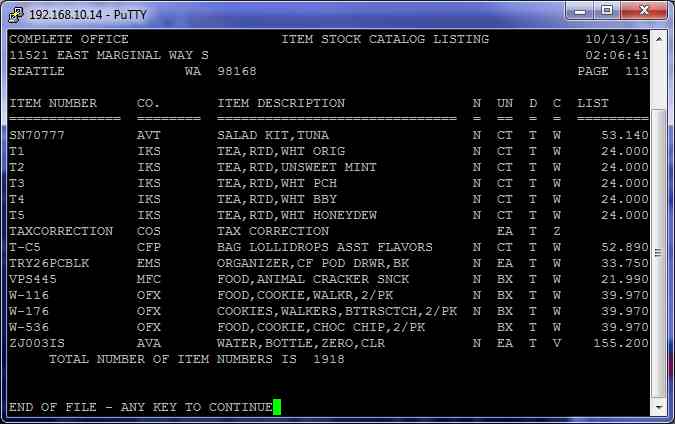
Now we’ll check to see if it worked. For the quick-n-dirty check, pull up an item showing on the above screen:
Nothing in Location 9, which is good. That’s as important as having what we want in 19, since I don’t want to accidentally start charging tax in my home state. Next, we switch to Location 19 (which is literally as easy as clicking in the Location box up top, set your location, and hit Enter).
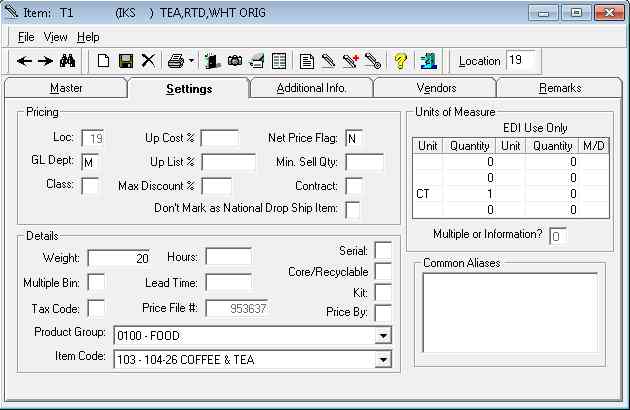
Perfect! To be thorough, I’d force an update on the SQL Server and check it in SSMS. The other thing to keep in mind is that, in some cases, this might change reporting. For the most part, you’ll probably want to keep using the Item Master GL Dept, but keep this in mind if you find reports working differently or not returning the results you expect – this change will write out your new GL Dept into OE History.
So now, I do the same again, except I change Dept U to N (since I wanted to keep them sequential). And I note this since I mentioned that I keep K-Cups in Dept U, so you don’t think I forgot about it or didn’t need to do anything with it.
Here we’ve walked through a simple mass-change in Item, adding a location-specific GL Dept to our non-taxable food and coffee items, so as to allow us to make them taxable. It can be a little frightening, since these selectors are powerful tools that will let you seriously bork your system if you’re not careful. Once you’re used to it, though, and know what you’re doing, these changes are quick and easy. Just be sure you have (or make) a backup before you change anything and anything you break, you can fix.
As ever, I remain 
Recent Comments